Simple Chicken Pot Pie (Cozy, Homemade Comfort Food)

There’s something about chicken pot pie that feels like a deep exhale. It’s the kind of meal that fills the house with warmth and reminds you that comfort can come from the simplest ingredients. In our home, this recipe shows up when the weather cools or when the week feels heavy — when I want dinner to feel like a hug. It’s not fancy or complicated. It’s made with a handful of good ingredients — vegetables, broth, milk, and a flaky pie crust — and it all comes together in one skillet. I make it on quiet evenings, often while the kids do puzzles at the table. The smell of onions and butter fills the kitchen, and somehow, even before it’s baked, it already feels like peace. I’ve tried different versions over the years — some with puff pastry, others with homemade crusts — but this is the one I come back to again and again. It’s simple, hearty, and creamy without being heavy. The filling comes together on the stovetop, and the crust bakes golden right over top. And like most of the best recipes, it’s forgiving. If you’re short on time, use rotisserie chicken and a prepared crust. If you’ve got extra vegetables, toss them in. It’s the kind of meal that makes itself at home in whatever season you’re in. Ingredients This recipe serves about 6 and comes together with simple, nourishing ingredients: It’s everything you need for a dinner that tastes like home — creamy, savory, and full of vegetables without feeling like “health food.” Instructions: How to Make Chicken Pot Pie Step 1: Sauté the Aromatics In a large cast iron skillet (or any oven-safe pan), heat the olive oil over medium heat. Add the diced onion and chopped celery. Cook until softened and fragrant, about 5 minutes. This is the part of the process that makes your kitchen smell like comfort — that buttery, savory scent that says something good is coming. Step 2: Add the Vegetables and Chicken Stir in the mixed vegetables, straight from the bag. Let them cook for 3–5 minutes until tender and slightly golden. Then add the shredded chicken and season with garlic powder, salt, and pepper. Give everything a good stir so the flavors begin to mingle. Step 3: Create a Creamy Filling Sprinkle the flour evenly over the mixture and stir well. This flour is what will help your filling thicken into that perfect creamy consistency. Slowly pour in the broth and milk while stirring constantly. Let it cook for a few minutes until the mixture begins to bubble and thicken. If it feels too thin, sprinkle in that extra tablespoon of flour and stir until creamy. Once the sauce coats the back of a spoon, turn off the heat. Step 4: Top and Bake Now comes the best part — that golden, flaky crust. Unroll your prepared pie crust and gently lay it over the skillet, tucking in the edges around the filling. Cut three small slits in the top to let steam escape. Brush the top with your egg wash for that beautiful sheen. Transfer the skillet to your preheated oven and bake at 425°F (220°C) for about 25 minutes, or until the crust is golden brown and crisp. Step 5: Serve Simply Let the pie rest for at least 5 minutes before serving — it’ll still be hot, but this short pause lets the filling settle and the sauce thicken perfectly. Serve warm, straight from the skillet, with a simple green salad or roasted vegetables on the side. Helpful Notes Variations This is one of those recipes that changes with you — whatever you have, it adapts. Why This Recipe Works What makes this chicken pot pie special is its simplicity. There’s no roux to fuss over, no long list of ingredients to gather — just good food made with care. The creamy filling is perfectly thick, not soupy or heavy, and the crust bakes right in the skillet so you don’t need to dirty another dish. Every bite has that familiar balance of tender chicken, sweet vegetables, and buttery pastry. It’s comfort food, yes — but it’s also practical. It stretches a few ingredients into a meal that feeds everyone, and it’s equally good reheated the next day. The Heart Behind the Recipe Homemade meals like this remind me that care doesn’t have to look extravagant. It can look like chopping onions while the kids chatter in the next room. It can look like using frozen vegetables because that’s what fits today. It can look like sitting down at the table with a sigh and realizing that simple food really does have the power to slow you down. I love that this recipe lives in that sweet spot — homemade, but not overwhelming. It’s the meal that helps you reclaim the quiet at the end of a long day. Closing Reflection: A Warm Meal, A Gentle Reminder If life’s been moving too fast lately, maybe it’s time for a meal that helps you pause. This chicken pot pie is exactly that — a reminder that good food doesn’t have to be perfect to be comforting. It’s warm, familiar, and nourishing in every sense of the word. Serve it on a Sunday evening when the house feels still, or on a Wednesday night when you just need dinner to be easy. Either way, I hope it fills your kitchen with the kind of peace that lingers long after the dishes are done. And if this recipe finds its way to your table, I’d love for you to subscribe to my newsletter so we can keep cooking and slowing down together. You can also share it with a friend who might need a little extra comfort this week — because a meal shared is almost always a meal multiplied.
Simple Sausage Pasta Bake with Mozzarella and Spinach

There’s something sacred about Sundays in our home. It’s the one day we slow down, go to church, put away technology, and try not to rush. I’ve learned that rest doesn’t just happen — it’s something we have to make space for. For me, that rest often begins in the kitchen on Saturday afternoon. This one-pot pasta bake has become one of our family’s favorite Sunday meals. It’s simple, hearty, and nourishing — the kind of dish that makes your home smell like love. I usually make it the night before, so on Sunday all that’s left to do is pop it in the oven. It’s also one of my go-to meals to bring a new mom or a family in need — because it’s one dish, easy to reheat, and always kid-approved. There’s something deeply comforting about delivering a warm, baked meal to someone’s doorstep — a quiet way of saying, you’re cared for. The beauty of this recipe is that it uses pantry staples — pasta, tomato sauce, cheese, sausage, and a few handfuls of spinach. There’s no elaborate sauce, no complicated steps — just honest, wholesome food baked until the edges are golden and bubbling. Why You’ll Love This Recipe Ingredients You’ll need: This combination creates the perfect balance — creamy, cheesy, and savory with just enough green to brighten it up. Instructions: How to Make Sunday Sausage Pasta Bake Step 1: Cook the Pasta Bring a large pot of salted water to a boil. Add the pasta and cook until just al dente — a minute or two less than the package says. Drain well and set aside. This is important: don’t overcook the pasta. It will keep cooking in the oven, and you want it to stay firm enough to hold its texture after baking. Step 2: Prepare the Sausage and Greens In a large skillet, sauté the sausage over medium heat, breaking it apart as it cooks. Once it’s browned and cooked through, toss in the fresh spinach. Stir for a minute or two until the spinach wilts and mixes beautifully with the sausage. If the sausage releases excess oil, you can drain a bit — but leave enough to carry that rich flavor into the sauce later. Step 3: Combine Everything In a large mixing bowl, combine: Stir gently until everything is evenly coated and creamy. Taste and add salt if needed — though the sausage and cheese usually provide plenty of seasoning. Step 4: Bake Preheat your oven to 375°F (190°C). Pour the pasta mixture into a 9×13-inch baking dish, spreading it evenly. Sprinkle the remaining mozzarella over the top. Bake uncovered for about 30 minutes, until the cheese is melted, golden, and bubbling around the edges. You’ll know it’s ready when your kitchen smells incredible and the top has that slightly crisped layer of cheese that’s hard to resist. Step 5: Serve Let it rest for about 5 minutes before serving. This gives the sauce time to settle and keeps the texture perfect. Serve warm with a simple green salad or a loaf of bread to soak up any leftover sauce. Helpful Notes Make It Ahead You can easily prepare this pasta bake the night before. Just assemble the entire dish, cover it tightly with foil, and refrigerate overnight. When you’re ready to bake, preheat the oven and bake directly from the fridge — add an extra 10–15 minutes to the bake time if needed. Choose Good Ingredients Use the real Parmigiano Reggiano if you can. It melts beautifully and adds a nutty depth that makes the sauce taste like it simmered for hours. And don’t underestimate good mozzarella — whole-milk versions melt better and have that irresistible stretch. One for You, One to Share This recipe doubles beautifully. I often make two pans — one for our family and one for someone who could use a home-cooked meal. It travels well and reheats perfectly, so it’s ideal for gifting. If you’re bringing it to someone, wrap the pan in foil, write the baking instructions right on top, and tuck in a note that says, Dinner’s done. Rest easy tonight. Variations & Additions Why This Recipe Works The secret here is balance. The tomato sauce brings brightness, the cream adds smoothness, and the cheeses melt everything together into something that feels generous but not heavy. The sausage provides flavor, and the spinach keeps it fresh and vibrant. Each bite holds a little of everything — creamy sauce, tender pasta, melted cheese, and savory sausage. It’s that combination of textures and flavors that makes people ask for seconds (and the recipe). It’s also forgiving. If you forget the cream or swap cheeses, it still turns out beautifully. That’s what makes it such a good “real-life” dinner — one that doesn’t depend on perfection, just intention. When to Serve (or Share) This dish fits every kind of day — quiet Sunday dinners, weeknight meals when you need something filling, or gatherings when you want to bring comfort to the table. And when life feels a little overwhelming for someone you love — a new baby, a hard week, a full schedule — a warm pasta bake can say what words can’t. It’s simple, portable, and full of love. Sometimes the most nourishing thing we can offer is a meal that says, I thought of you. Closing Reflection: A Sunday Kind of Rest Making this pasta bake has become a ritual for me — one small act of preparation that makes room for stillness later. It reminds me that homemaking isn’t about constant motion; it’s about rhythm. It’s knowing when to work and when to rest, when to stir and when to simply let things bake. So if your week has been full, if you’ve been carrying more than you’d like, maybe this meal can mark a pause for you too. Put the water on to boil. Stir the sauce. Layer the cheese. Let your kitchen fill with warmth. Then, when you sit
Soft Sandwich Sourdough Bread (Long-Fermented & Easy to Digest)
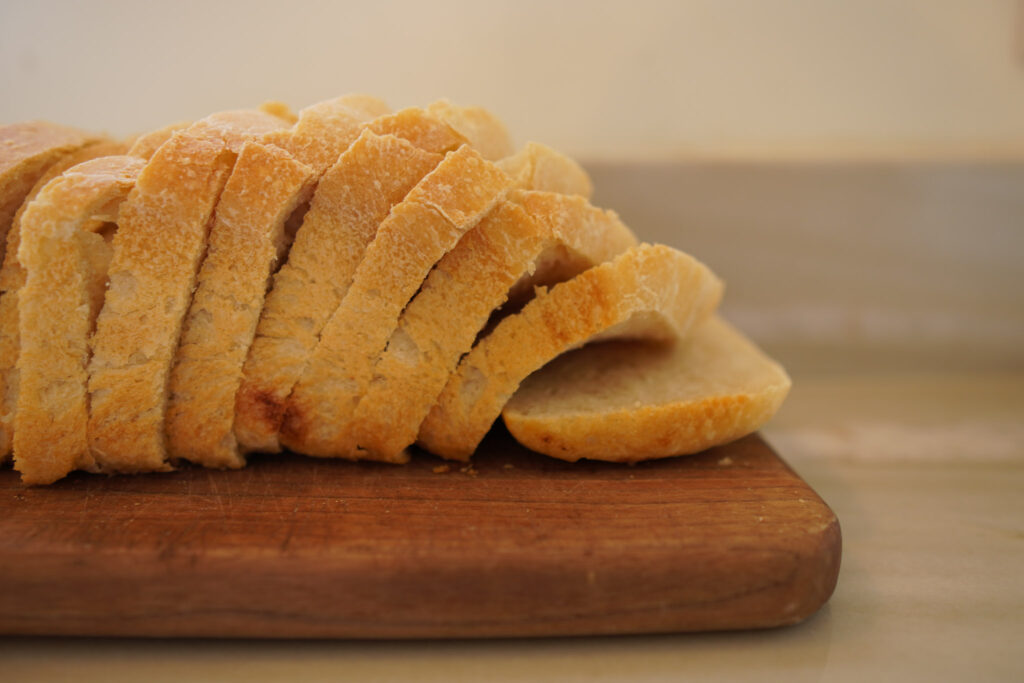
There’s a quiet rhythm that fills our kitchen when sourdough is rising on the counter — the kind that slows you down without asking you to stop. In our home, we let time do the heavy lifting. A 12–14 hour cold ferment gently breaks down gluten and phytic acid, making the bread softer, more digestible, and full of flavor. It’s a simple act of patience that transforms flour and water into something nourishing and alive. I started baking sourdough during a season when life felt too fast. Everything was loud — full of alerts, lists, and shoulds. Bread became a small rebellion against all that hurry. Mixing, folding, waiting — it taught me that rest isn’t empty time; it’s fruitful time. This loaf, in particular, has become our daily bread. It’s soft and sliceable, with a subtle tang that pairs as easily with peanut butter as it does with butter and salt. It takes two days, yes — but almost all of that time is hands-off. You’ll spend a few minutes tending it, and the rest letting it do its quiet work while you do yours. It’s a loaf that fits seamlessly into an intentional life — one shaped by rhythm, not rush. Why Long-Fermented Sourdough? Sourdough doesn’t demand instant results. Instead, it rewards patience. A long, slow fermentation gives this bread both depth of flavor and gentleness on digestion. When you give the dough time to rest — especially during an overnight cold proof — natural enzymes and bacteria begin to break down gluten and phytic acid. That’s what makes sourdough easier to digest and what gives it that tender crumb and mild tang we love. This isn’t complicated baking. It’s simply the art of waiting — of trusting time to do what you can’t force. Ingredients: Minimal and Nourishing Just seven ingredients, all simple and familiar: Each one serves a purpose. The olive oil keeps the loaf tender, the vinegar strengthens the structure, and the honey brings a quiet sweetness that rounds out the flavor. Together, they create a soft, balanced loaf that holds its shape beautifully. A Two-Day Process, Naturally Day 1: Build and Ferment 1. Feed Your Starter Begin with a bubbly, active sourdough starter. Feed it a few hours before mixing so it’s strong and lively. If you’re new to sourdough, I’ve written guides on how to feed a starter and how to build one from scratch — both are simple and approachable. 2. Mix the Dough In one bowl, whisk together your flour and salt. In another, combine starter, water, olive oil, honey (if using), and apple cider vinegar. Pour the wet mixture into the dry and stir with a spoon or your hand until a shaggy, sticky dough forms. It should feel soft and slightly tacky — resist the urge to add more flour. That gentle hydration is what makes your crumb soft later. 3. Bulk Fermentation (4–6 hours) Cover the bowl with a damp towel and let it rest at room temperature. Every 30 minutes for the first 2 hours, perform a gentle stretch and fold to build strength. After 4–6 hours, your dough should have a light rise and feel smoother to the touch. 4. Shape the Dough Dust your counter lightly with flour. Gently shape the dough to fit a 9×5-inch loaf pan. Avoid kneading — just guide it. Place the dough into a lightly greased pan and cover with a loose plastic bag or damp towel. 5. Cold Proof (12–14 hours) Transfer the covered loaf to the refrigerator. This slow rise deepens the flavor, improves texture, and makes the bread easier to digest. Day 2: Bake and Enjoy 6. Preheat the Oven When you’re ready to bake, preheat your oven to 375°F (190°C). If you have a baking stone or steel, place it in the oven as it heats — it helps maintain even warmth. 7. Bake (40–50 minutes) Bake the loaf (still in its pan) directly on the hot surface. Check after 35 minutes. If it’s browning quickly, tent it loosely with foil. Your bread is ready when the top is golden and it sounds hollow when tapped, or when an internal thermometer reads 200°F (93°C). 8. Cool Completely Let the loaf cool in the pan for 10 minutes, then transfer to a wire rack. Wait until it’s fully cool before slicing to allow the internal structure to set. Storing Your Sourdough Intentional Notes for Intentional Bakers Hydration: This dough should be slightly sticky — that’s how you get a soft, tender crumb. If it feels too wet, you can add up to 25g more flour during mixing. Spelt Flour Option: Replace half the flour with spelt for a lower-gluten loaf. It bakes up slightly nuttier with a more delicate crumb. Soft Crust Tip: Brush the top with olive oil or melted butter right after baking. It keeps the crust soft and adds a lovely sheen. Why This Recipe Works This long-fermented method takes time, but not much effort. The dough practically makes itself — you just guide it. The overnight cold proof gives the bread structure and flavor without needing commercial yeast or additives. It’s reliable, forgiving, and fits easily into a busy routine: mix on Saturday morning, bake on Sunday, and enjoy all week. The texture is soft enough for sandwiches but sturdy enough for toast. The flavor is mild — that gentle sourdough tang that’s more comforting than sharp. It’s the kind of bread that feels humble and nourishing, never fussy or forced. A Loaf Worth the Wait This bread isn’t fast. It doesn’t rely on gadgets or shortcuts. It’s shaped by time, patience, and presence — the same values that steady the rest of life. There’s something deeply grounding about baking bread that asks you to pause. You can’t rush fermentation. You can’t skip rest. And maybe that’s the beauty of it — a quiet reminder that some things are meant to take their time. Slice it thick for morning toast. Pack it
Healthy Belgian Spelt Waffles (Easy, Nutrient-Dense Recipe)

When I think of childhood breakfasts, I picture waffles. Not the golden, homemade kind that steam on the counter — but the frozen ones that popped from the toaster, crisp and sweet, always eaten too fast before school. I loved them then, though I was always hungry an hour later. Now, years later, I find myself back at the waffle iron, but this time as a mother — with a little more wisdom about food, a little less time in the mornings, and a deep desire to feed my family well. I’ve learned that waffles don’t have to be complicated. They can be made from good ingredients — flour that nourishes, butter that comforts, and a touch of maple syrup that feels like a hug from nature. These Belgian Spelt Waffles have become our family’s go-to breakfast for slow Saturdays and busy school mornings alike. They’re hearty but light, crisp on the edges and tender inside. Most of all, they’re simple. The kind of recipe that invites your children to stir the batter, to peek over the counter and ask if the next batch is theirs. And maybe that’s why I love them — because food like this is about more than eating. It’s about connection, presence, and those little domestic moments that anchor a home. Belgian Spelt Waffles Recipe Yield: 12 wafflesPrep Time: 10 minutesCook Time: 15 minutesTotal Time: 25 minutes Ingredients Dry Ingredients Wet Ingredients Instructions Step 1: Preheat Your Waffle Iron Start by preheating your waffle iron according to the manufacturer’s instructions. A hot iron ensures your waffles will be crisp on the outside and fluffy inside. Step 2: Mix the Dry Ingredients In a large mixing bowl, whisk together the spelt flour, baking powder, baking soda, and salt. Spelt flour tends to clump a bit, so a good whisk makes all the difference. Step 3: Combine the Wet Ingredients In another bowl, whisk together the milk, water, maple syrup, eggs, vanilla, melted butter, and coconut oil until smooth and well-blended. The batter will smell faintly of vanilla and warm sweetness — already comforting before it hits the waffle iron. Step 4: Bring It All Together Pour the wet mixture into the dry ingredients. Stir gently, just until combined. Don’t overmix; a few small lumps are perfectly fine and keep the waffles tender. Step 5: Cook the Waffles Grease your waffle iron lightly if needed. Pour about ½ cup of batter (depending on your waffle maker size) into the center and spread it slightly before closing the lid. Cook for 3–5 minutes, or until golden brown and crisp around the edges. When you lift the lid and see that perfect grid of steam and gold, you’ll know they’re ready. Step 6: Serve and Enjoy Place each waffle on a cooling rack instead of stacking them — this keeps them from getting soggy. Serve warm with butter, maple syrup, or your favorite toppings. Helpful Notes & Variations Why Spelt Flour? Spelt flour is an ancient grain with a mild, nutty flavor and a wholesome texture that gives these waffles their heartiness. It’s naturally higher in fiber and protein than white flour and easier to digest for many people. When I first started using spelt, I was worried the waffles might turn out heavy — but they didn’t. Spelt holds its own beautifully in this recipe, creating waffles that are crisp on the outside and tender in the center. The Nourishment of Real Butter Butter adds more than flavor; it carries a kind of comfort. It’s a natural fat that contains vitamins A and D and helps our bodies absorb other nutrients. Most of all, it reminds me of the beauty of simplicity — that something as ordinary as butter can make a meal extraordinary. If you prefer, you can use all coconut oil, but I think the flavor of butter makes these waffles taste like home. Make-Ahead & Freezer Friendly I often double this recipe on Saturday mornings so we have extras for the week. Once cooled, lay the waffles flat on a baking sheet and freeze until solid. Then store them in a freezer bag. To reheat, pop them in the toaster or oven for a few minutes. They come out as crisp as the day you made them — a small gift for Monday mornings. Variations & Topping Ideas Topping favorites in our home: Tips for Success The Heart Behind the Recipe I’ve always believed food is about more than nourishment — it’s about memory. These waffles aren’t fancy. They don’t call for hard-to-find ingredients or complicated techniques. But they hold something I find sacred: enoughness. There’s enough goodness in simple food made well. Enough joy in a quiet breakfast around the table. Enough grace in the small act of feeding those we love. When I serve these waffles, I think of how the morning light falls through the window, how my kids chatter about whose turn it is to drizzle the syrup, and how the smell of toasted butter fills our little kitchen. This is homemaking in its simplest form — no rush, no perfection, just peace in the practice. A Moment for Reflection: Slowing Down with Intention In a world that tells us breakfast should be quick and tidy, I think there’s something quietly rebellious about making waffles from scratch. It’s a way of saying, I have time to nourish, to slow down, to be here. I’ve made these waffles for friends after long weeks, for postpartum mamas who need a warm meal, for Sunday mornings when the table feels extra full of gratitude. Every time, they bring the same thing — smiles, comfort, and a little calm before the day begins. So maybe this recipe isn’t just breakfast. Maybe it’s a small act of hope — a reminder that nourishment doesn’t have to be complicated or perfect to be meaningful. Closing Reflection: The Sacredness of the Everyday If there’s a thread that runs through every recipe I share, it’s this: the everyday
Chocolate Chip Oatmeal Bake (Healthy, Easy Breakfast Recipe)
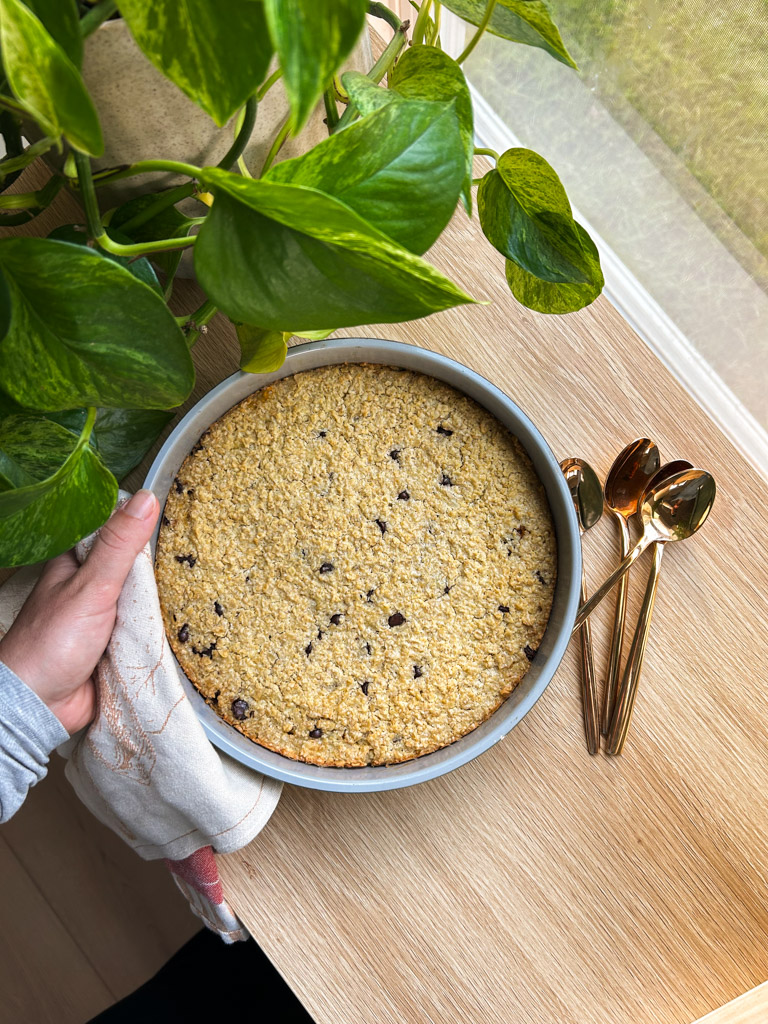
A simple, nourishing breakfast recipe for busy mornings There’s nothing better than waking up to the smell of a warm, nourishing breakfast—especially when you’ve got little ones to feed. This Chocolate Chip Oatmeal Bake has quickly become a staple in our home, and it all started on a week-long beach vacation with my sisters. Between us, we had nine children, which meant mornings could have easily turned chaotic. But this recipe saved us. We prepped everything the night before, popped it in the oven first thing in the morning, and within half an hour, we had a warm, filling meal with almost no cleanup. Every mom needs recipes like this in her back pocket—simple, healthy, and crowd-pleasing. Why Moms Love This Chocolate Chip Oatmeal Bake 1. Stress-free mornings All the prep can be done the night before, so you can wake up, pop it in the oven, and move on with your morning. Whether you’re homeschooling, packing lunches, or wrangling toddlers, this is one less thing to think about. 2. Nourishing and filling Oats give lasting energy, eggs and gelatin add a protein boost, and coconut milk (or regular milk) provides healthy fats to keep everyone satisfied until lunchtime. 3. Kid-approved The chocolate chips win every time. They add just the right amount of sweetness to make it feel like a treat without overdoing the sugar. 4. Versatile and forgiving This recipe fits whatever season you’re in—literally and figuratively. You can mix in apples in the fall, berries in the summer, or bananas and peanut butter in the winter. It’s the perfect “clean out the pantry” kind of breakfast. If you’ve been searching for an easy, wholesome breakfast your kids will ask for again and again, this one’s for you. Ingredients You’ll Need Here’s the base recipe (serves 6–8): Ingredient Notes & Substitutions Oats – We use organic rolled oats most often, but quick-cook oats work just as well. Steel-cut oats won’t soften properly in this recipe, so skip those. Coconut milk – I love the richness and healthy fats from full-fat coconut milk, but you can absolutely use regular milk (cow’s or almond). If using milk, add 1.5 cups of water to achieve the same liquid ratio. Maple syrup – You can use honey, coconut sugar, or even a few tablespoons of organic cane sugar instead. Adjust the sweetness based on your family’s preference. Gelatin – Totally optional, but I like to include it for the extra protein and gut support. We use Perfect Supplements Gelatin, made from grass-fed cows and free from additives. Chocolate chips – Mini dark chocolate chips are our favorite, but use what you have. You can also swap them for blueberries, chopped dates, or nuts if you want to reduce the sugar. Step-by-Step Instructions 1. Mix the ingredients In a 10×8 baking dish, combine all the ingredients. (Yes, you can mix it right in the dish for less cleanup—because no one needs more dishes.) 2. Soak overnight (optional but recommended) Cover the dish with a tea towel or foil and place it in the fridge overnight. This step makes the oats easier to digest and deepens the flavor. If you’re in a rush, you can skip this and bake it right away, but soaking adds that extra softness. 3. Bake in the morning When you wake up, preheat the oven to 350°F. Uncover your dish and bake for 20–30 minutes, until the top is lightly golden and no liquid remains in the center. 4. Serve and enjoy Scoop into bowls with milk poured over top or slice into squares and serve with bacon or sausage on the side. Flavor Variations to Try Once you make this a few times, you’ll start finding your favorite combinations. It’s one of those recipes that invites creativity without ever feeling complicated. Summer: Blueberries + lemon zest + chia seedsFall: Apples + walnuts + a sprinkle of nutmegWinter: Bananas + chocolate chips + peanut butter drizzleSpring: Strawberries + coconut flakes + vanilla Let your kids choose their mix-ins—it gives them ownership and excitement about what they’re eating. How to Serve Chocolate Chip Oatmeal Bake This oatmeal bake is so versatile. You can enjoy it warm, cold, or even as an afternoon snack. FAQs Can I make this dairy-free? Yes! Coconut milk, almond milk, or oat milk all work beautifully. Can I make it egg-free? Yes—replace the eggs with 3 flax eggs (1 tablespoon ground flax + 3 tablespoons water each). Let them sit for a few minutes to thicken before mixing in. Can I freeze oatmeal bake? Absolutely. Bake as directed, cool completely, then cut into squares and freeze in an airtight container. Reheat in the oven or toaster oven. How long does it last? Stored in the fridge, it keeps well for 4–5 days. Tips for the Best Oatmeal Bake Don’t skip soaking – Soaked oats are gentler on digestion and create a creamier texture. Let it rest before slicing – This helps the bake hold together. Use parchment paper – Makes cleanup and serving a breeze. Get creative with toppings – Try yogurt, nut butter, honey drizzle, or sliced fruit. A Nourishing Routine for Simple Mornings As a homeschooling mom, I’ve learned that mornings set the tone for the whole day. If breakfast feels chaotic, the rest of the day often follows suit. But when I start the morning with something simple, wholesome, and already prepared, everything feels lighter. This Chocolate Chip Oatmeal Bake is one of those recipes that supports a slower, steadier rhythm. You can make it on a Sunday night and enjoy it throughout the week—perfect for homeschool mornings, early errands, or just when you need a calm, easy start. It’s also wonderful for postpartum moms or friends who could use a little help. I often bake an extra pan to share—because nothing says “I see you” like a homemade breakfast that requires no effort at all. Simple Living, Nourishing Food Minimalism in the kitchen doesn’t have to mean less flavor or fewer
Homemade Strawberry Shortcake (Classic, Easy Summer Dessert)

There’s something timeless about strawberry shortcake. It’s simple, bright, and full of that nostalgic summer sweetness we all crave. This recipe stays true to the classic version — buttery shortcakes, lightly sweetened strawberries, and soft clouds of whipped cream. It’s the kind of dessert that feels impressive without asking you to spend all day in the kitchen. Below, you’ll find everything you need to make this warm-weather favorite, along with helpful tips for getting the perfect texture every time. Why You’ll Love This Recipe Strawberry shortcake is one of those desserts that everyone seems to adore. It’s fresh, light, and never overly sweet. Plus, it comes together quickly, which makes it perfect for entertaining, weeknight treats, or a slow summer afternoon with your kids. More reasons it stands out: It’s a classic for a reason. Ingredients You’ll Need For the Strawberries For the Shortcakes For the Whipped Cream How to Make Strawberry Shortcake 1. Prepare the Strawberries Start by combining the sliced strawberries, sugar, and lemon juice in a bowl. Stir gently, then set them aside for at least 20–30 minutes. As they rest, they’ll release their juices and soften — becoming the perfect filling. 2. Make the Shortcakes In a large bowl, whisk together the flour, sugar, baking powder, and salt. After that, cut in the cold butter using a pastry cutter or your fingertips until the mixture resembles coarse crumbs.Next, pour in the milk and vanilla. Stir until the dough comes together, but avoid overmixing. Turn the dough onto a lightly floured surface. Pat it into a 1-inch-thick circle, then cut out 6–8 shortcakes using a biscuit cutter or the rim of a glass. Place them on a parchment-lined baking sheet. Bake at 425°F for 12–15 minutes, or until the tops are lightly golden. 3. Whip the Cream While the shortcakes cool slightly, whip the heavy cream, powdered sugar, and vanilla until soft peaks form. The texture should be light and airy — not stiff. Assemble Your Classic Strawberry Shortcakes Once everything is ready, carefully split the warm shortcakes in half. Spoon the juicy strawberries over the bottom half and add a generous layer of whipped cream. Then place the top half over everything and finish with one more dollop of cream. Tips for the Best Strawberry Shortcake Storage Instructions Strawberry shortcake is best enjoyed fresh, but you can easily prep the components ahead. Helpful Notes & Variations Choose Ripe, In-Season Berries This dessert lives or dies by its strawberries. Look for bright red berries that smell fragrant — that’s when they’re at their sweetest. If your strawberries aren’t quite in season, a teaspoon of lemon juice added to the sugar can help bring out their flavor. Make Ahead Without Stress You can bake the biscuits earlier in the day, even the night before. Store them in an airtight container at room temperature. Assemble the shortcakes just before serving so the biscuits stay tender, not soggy. If you’re hosting, you can also prepare a “shortcake bar” — biscuits in a basket, a bowl of berries, and a pitcher of whipped cream — and let everyone build their own. Kids love this, and it keeps everything easy and fresh. Swap Ideas Final Thoughts This Homemade Strawberry Shortcake truly embodies summer: effortless, fresh, and full of joyful flavor. Whether you’re hosting friends or simply craving something sweet after a long day, this classic dessert always feels special.

